Pile of miniature figures in pieces

The Shattering Reality of my Miniature Collection


Disaster Strikes

Last weekend a disaster struck. A massive majority of my miniature collection has come crashing to the ground thanks to the adventuresome behavior of my cat, Turtle. You see at the moment my miniatures are being housed in an old bedroom TV cabinet as I am working on “figuring out” an improved method of widespread storage. In reality I have been continuously making it worse by stacking an increasing number of boxes and containers on top of each other just waiting for the day something shakes the whole tower down.

Well that day happened. On Saturday I heard a large CRASH and was terrified it was my curious toddler. I go running and immediately feel two emotions. First I am absolutely relieved to find that no child or animal was hurt. Secondly I felt my heart sink to my stomach as I saw the devastation the laid before me.

Miniatures lay in pieces scattered over the floor as hundreds of models crashed on top of each other, into other boxes or just spread out. The largest damage of which is my painted miniatures of 2021. Over half of all models painted in the last year lay in pieces. 


Trying to Piece it Back Together

I then proceeded to spend a large portion of my time to see if I can glue as much of the minis together. While I was trying to piece much of my hardwork of 2021 I had an inner dialogue of problems and perhaps ways I can fix them and should focus on for 2022.

Cutting mat with broken miniatures and superglue to repair the models
The surgical field, to glue models back together.

Trying to Solve the Problems

Actually Utilizing My Storage Solutions

“Carrie, why in the world did you wait this long to try to organize your models?”

Voice in my head

You see this is actually ironic because last year I spent a long post series on organizing my collection & hobby space: Storage Wars. I even went as far to develop a new storage tray system for my models (Storage Wars: Part 3 Miniature Storage Trays). Yet in my haste towards the end of the year I did not fully utilize system. The biggest issues that I have is that I have no way to display or store models I’m using that are completed.

Solution: Actually utilize my storage solutions! Take the time to put models away. Find a way to store finished models safely or on display.

Experiment with New Materials

The harsh reality of it is that resin from 3D printing can be extremely brittle. Depending on the material used, duration of cure times, or even staying in storage exposed to UV light can increase this brittleness in your resin models & terrain. Towards the second half of last year I began to use harder resins which are more impact resistant making them more likely to just break rather than shatter. This was definitely noticeable in my Dwarven Frostgrave army printed mostly in 2020 rather than my husband’s necromancer undead army printed later 2021. When the newer models broke I could find most of them to try and glue back together. However some of the original resins used that were basic resins without additives such as ABS-Like or Hard were more likely to shatter rather than break. Let this be a testament on more durable resins being valuable! However in truth and with all the benefits of 3D printing the brittleness of the models definitely is a very strong negative about the 3D printing hobby. I had no reaper bone model damage, metal model damage and very little hard plastic model damage. 

Solution: Prime all printed models to prevent more curing from storage & investigate and start a series of experiments with flexible resin additives to give models more give and capabilities to stay intact.

Begin Cataloging My Collection Again

Last year I started a database of my miniature collection as well as a visual catalog. While it is still a long way to go it is a start. One major downside to this is that in December I sold off a large portion of my collection and did not update my spreadsheet or visual. I need to go back through the list and update the data before I can continue to grow again.

Solution: Update the Spreadsheet, visual catalog and actually track the known vs unknown.


Conclusion

I recognize that finding better systems to account for ever curious toddlers and adventuresome creatures is a much needed thing. I wish I could have shelves to hold the things I love and have spent time on but just do not have the space for it in our home. If you have a precarious pile of models this is my warning to you to make it safer.

How do you keep your hard purchased or crafted items for your tabletop games safe? I keep telling myself that this is the moment where I learn my lesson, but only time will tell.

Happy Hobbying!

Carrie aka crazmadsci the Crazy Mad Scientist


Past Writings

Storage Wars (Part 4) Project Tracking & Workflow


Introduction

Last but not least, regarding my war of attrition against entropy is my recently improved project tracking and workflow system.  It might sound silly that one would need to require a method of keeping track of projects and steps within projects, however since I jump around alot having some kind of method to my madness helps. Not only do I need some kind of system to help me keep track of project statuses, I want a method to keep track of what I’ve done, plan to do, or ideas for the future. The whole process has become increasingly more complex with the addition of the website as well.


Previous Project Software

Before I go into the current system I’m using lets talk about ones I’ve used in the past. Previously I’ve used and tried all kinds of software such as Trello for project statuses. Using software such as Trello is what was most familiar in form and function to systems used in previous jobs so navigation for massive projects was ingrained in me already.

While I enjoy this software a lot and it does have integration to my cell phone and other electronic devices. The system uses a series of boards which can have cards to slide across the boards to track what step pieces of that project are worked on. Each card can have notes, links, attached files, and even be integrated without side programs. This would make it easy when sitting around to add more or less to the Trello board and see project status.

Previously used main Trello Board Page

The largest downside to this method is that I struggled having a board for each project and having the projects fit my monitor without scrolling. Having a better global picture of my progress at one easy glace was not easy.

Lost Adventures Vol 1 Project Board

Another downside of this is that I want to keep track of what I accomplished each day or what area of the hobby I was focused in. This aspect is not accomplishable through trello.

To compensate for that I have been using Evernote which is a digital notebook to keep track of different write ups, mental notes, etc. I used both Evernote and Trello in tandem to build a workflow state. But again it became too complicated as I began to grow the number of ideas I had, projects in various states of completion or just things I want to remember. As I wrote more notes they slowly got lost more and more frequently in the depths of my various notebooks defeating the purpose of writing them in the first place. I still sometimes write drafts in Evernote such as a recent post draft: How Do You Magnetize Models Anyways

Current Evernote Setup

The New and Improved

I have been using Trello and Evernote together since about December and decided to try something a bit different. After listening to one of the latest episodes of Paint Bravely the Podcast, Brent from Goobertown hobbies mentioned the usage of a bullet journal for the hobby. I have always appreciated the concept of a bullet journal but never considered it for a specific aspect of my life. If you are not familiar with a bullet journal it is essentially a planner that is catered exactly to your needs. The reason for this is that the bullet journal is essentially created by you the writer to fit your needs. There are some people who completely obsess with the visual appearance of their bullet journal and I’m definitely aiming for more function.

There are Pinterest boards, YouTube videos and even a designated subreddit on the subject of bullet journals and various templates for creating each page. 

To better understand what I mean how about I share some of my favorite pages so far. 

The largest pages that I am currently using regularly are:

1) A main project page

             This includes all the steps it takes for each category to get from being printed to having a write up on the blog along with being cataloged in my collection.

This is the same as a trello board with cards mentioned above but there is something extremely satisfying with coloring in each square and being to see the project as a whole more clearly. I use blue as completed and orange as blocked due to some reason or another at this time. 

2) An idea bubble.

             This is new and is essentially my idea page for a landing website page for the blog. I like to have an idea of what I want to add to the page when designing and planning things I have to come. This can help me scheme global layouts and I can mark them off as they are completed. 

You can see in this page I’m hoping to have a series of guides regarding resin printing. It can be a wide and complex category so any time I think of more to add I’ll put it in the bubble with notes to the side of what they would contain. 

3) Monthly hobby type wheel.

             I absolutely loved seeing the percentage of days I spent doing different aspects of the hobby for my January/ February Retrospectives but I lost track of it in March/April due to the data being hosted on a google spreadsheet. This is a super easy way to summarize a large overview of what I did for that day. I have a key at the bottom to dictate what each color means. Anything blank means I unfortunately did not get anything worth noting done that day.

             I do also have a weekly/monthly planner of sorts which I write the info of what I accomplished in more detail.

Overall the system appears to be working for me and it is easy to carry a notebook around the house. The only difficulty is if my small assistant runs off with my pen or colored pencils which he loves to do.

I have noticed that since moving to a physical medium for note keeping my productivity has increased. I am also working through my backlog of data faster and more efficiently. 

I don’t think any system is perfect and it is a long work in progress. I’m hoping to include paint recipes and colors in the future to the notebook but I am burning through pages faster than anticipated. I might need another book which stays on my desk at all times.

Do you have a system in place for project management? 


Conclusion

Thank you for following along with my short series for storage and organization.  I know this was a ton to unpack but has been essentially the last two months of my hobbying experiences.

I am slowly starting to hobby again and finish things up but doubt I will be really ready to dive into something again until after the new addition arrives to our house and a new normal is in place in terms of routine. However I have been putting a lot of work into the Kingdom of Thamarya buildings I’ve printed. I’ve tried several new things that I’m looking forward to sharing with you. Stay tuned for a write up on that! 

As always thanks for hanging out and reading. Let me know what you think.

Happy Hobbying,

Crazmadsci


Continue Reading

Storage Wars (Part 3) Miniature Storage


Introduction

Miniature Storage is the largest areas of time sinks I’ve had over the last two months. While it feels silly that one can spend so much time on the method of which to store and organize models and figures. My mentality is that if I will spend the time to make & create these things why not protect them as well.

I started to do research on the different storage solutions out there for miniatures including magnetizing, foam trays, carrying cases, nail polish stands, etc.

Lets look at some of the different types.

Magnetizing: Is a system i’m super interested in doing, however this is more rigid to based miniatures and ones with hollowed bases to hold magnets. Since most of my 3d printed miniatures do not start out based this would not work for the pile of opportunity I have laying around. Also many 3d printed bases do not have holes for magnets and would require drilling. I would say magnetizing is the most common solution i’ve found online for miniature figures.

Nail Polish stands: These are extremely popular for both paints and miniatures to allow you to have an amphitheater type display shelf of what you have done. While this looks nice I do not have the shelves to store my miniatures.

Hardware Drawers & Tackle Boxes: Also popular since things like tackle boxes have sectioned areas with separators and are meant to be portable. However the hard plastic of the sectioned areas I knew would be to tough on my more fragile miniatures. I also need a mobile system so the hardware drawers would not work and would need something close to a box.

Foam Trays: This is probably the closest to what i’m looking for. Using foam tray would help isolate individual miniatures and also be modular to mix up which trays are out and about at any given time. However I also have heard quite frequently that foam trays commonly rub paint off the miniatures. I have not been consistent about varnishing my minis and am worried about that happening.

These trays can also come with soft or hard cases and sometimes travel bags to go to game stores or tournaments. This would most likely be the most expensive option for my miniature storage. I am personally not yet ready to invest in something super expensive and am still evolving my collection. I also needed my storage to be mobile and rigid to be capable of stacking as well unfortunately climbed on while still keeping the figure safe. I think I’d do an official system such as this if I ever owned my own completed army for 40K or similar.

Feldherr Maxi Figure Case example

As a result this is of course as you probably already have guessed it caused me to begin experimenting with various storage solutions of my own to cater to my unique needs.


Previous System Design

Previously, the most complex system I’ve used was designed by my incredibly handsome husband which used a modular sliding tray system to hold models. I would have a plastic box which could hold up to 8 of these trays and each tray would hold approximately 30 standard miniatures. Therefore each box could hold up to 180-200 models. It was an incredible way to hold models in place for an extremely efficient model per area storage method. Trays could be designed to hold a variety of base sizes and only required some simple 3D modeling changes.

The downsides however began to creep up on me. Firstly, if the figures were of varying base sizes especially non standard 20 mm, 25 mm, 50mm, etc. sizes they would not fit onto the trays and stay. So I’d need to make specialized trays for them or some kind of holder per miniature that didn’t fit the design criteria. Also not all miniatures come with bases already on them requiring me to temporarily tack them onto a base or glue them. Also the way the tray holds into the miniature the ideal threshold for height of the bases and things on it resulted in a slim threshold for flexibility and creativity. As a result trays are being shelved (pun intended) for the time being.


The one thing I’ve absolutely loved was using this tray system however was using a custom wall mount above my workstation to hold miniatures up and out of the way.

Example of the working wall mount

Current Iteration

As a result to the rigid restrictions of the 3d printed storage solution. I started to design my own miniature storage trays that was not as dependent on learning design software. I’m still such a beginner using the various software and realized I was reliant on the incredible talents of my other half. I’m not afraid to learn but sometimes these things take time you do not have at the moment.

Earlier in the year I started experimenting using cardboard, foamcore, and old archivist book board (from an old job). I thought I was have an interstate move so I then began to organize my scatter terrain. Previously I stored scatter terrain in the classic plastic craft/jewelry plastic box, however I was outgrowing my storage containers quickly and needed a larger storage solution that would be more efficient and cost less overall.

While the above system works well it did not give me a lot of flexibility for reusability as I wanted to move objects around or hold things in place more resulting in a consistently more chaotic box every time I moved it or the baby bumped the box.

Overall I loved the concept of the newer storage but I needed to store more fragile miniatures. Time to go back to the drawing board in material choice. Criteria, I needed a more robust and flexible system.

I concluded to use almost all foam core aka poster board as my material of course. The goal of the foam core is to be semi soft but also rigid. This could provide protection for the figures but also be capable of bearing the weight of several in a tray. Also since it is soft I use toothpicks to hold spacers in place adding to extra rigidity to hold miniatures in place but also modular to be reused in the future as my storage adapts and evolves.

I planned to make trays that fit into some of my favorite boxes, plastic ornament boxes. This would make me capable of making it modular and therefore adjustable for almost all my figures based or not up to about 4 inches (10.16 cm) in height. If the box is the top of the stack and due to how the lid sits on the box rather than inside of it my models can go up to 4.5” in height.

Favorite storage boxes. Snapware Snap ‘N Stack 13 x 13 inch

I also discovered that since these boxes are essentially 1 x 1 feet (30.48 x 30.48 cm) my trays will also fit perfectly in the cube boxes which are affordable and even available at the grocery store. Any trays I made would be capable to store in the super prolific cube shelves with the cloth boxes as well.

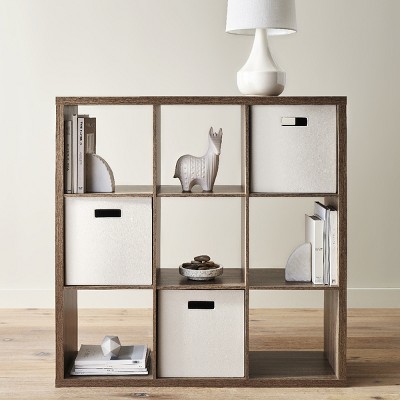
Cube Shelf Example

The Miniature trays themselves were similar to the scatter terrain trays but were instead constructed with 100% foam core. The bottom and sides would be glued using hot glue and I also glued the rows to hold the miniatures. Then using white foam core I would use toothpicks to hold the miniatures to custom widths to snugly fit the models. These could be adapted and changed as needed if the trays changed its contents. For the guide on how I built these trays check out my DIY Foam Core Miniature Storage Guide.

For the trays I’ve counted approximately 70-80 standard miniatures per box (two trays per box). I also have made a variant for large monsters but have yet to completely fill an entire box at this moment for the full count.

Miniature Storage Tray Example feature Lost Adventures Vol 2 Models

In some cases for larger miniatures I would instead use a harder card stock as the bottom saving the 1/4th inch ( 6.3 mm) in height and could customize the height.

Large Mini Tray in progress

I also used different cardstock on the outside of the trays so that way from afar I could pull out specifically what box I was looking for in the future.

Overall I’ve really happy with the solution as it can be modified to almost all my miniatures and scatter terrain. Also due to the rigidity of the boxes and foam core it can currently withstand the weight of a small human who apparently likes to climb on them.

Tiny Human sitting on a miniature box

I have some future ideas on trays for terrain that I’m looking forward to experimenting with. That will have to wait though. For now these homemade foam core trays are my current solution. Let me know what works for you? Have you experimented with different methods? What ideas you have on improving my system.


As always thanks for hanging out and reading. Let me know what you think. Next up, the evolution of my project organization, notes, and workflow as apart of my Storage Wars Series.

Happy Hobbying,

Crazmadsci


Continue Reading

Storage Wars (Part 2) The Hobby Space


Introduction

As part of my large overhaul in storage and organization, (State of the Crazy: Storage Wars Part 1) a revamp and improved Hobby Space was in order.

Now a hobby space is a highly discussed topic and almost an extension of yourself as a creator. Pictures shared of your hobby area or tours are often discussed and shared as much as pictures of paint jobs and projects it seems. The community almost enjoys sharing their hobby “home” as much as they share finished projects. If you doubt me just search “Hobby Space” on YouTube and you will see numerous videos of creators talking about how to improve and maintain your space as well as showcasing their own. One of my absolute favorite discussions on the topic is the Paint Bravely Podcast “What Makes a Good Hobby Space” and they go as far as to rate your hobby space by level. The more sophisticated the setup the higher the level within the realm of miniature painting.

The ultimate goal of having a hobby area is to have a place to maintain momentum, have everything you need, and hopefully inspire you to create. For me my hobby desk has evolved significantly over the years. As always it just began as a place to hold my paints, brushes and what you i’m painting. So I think it is time to show you my current version of my hobby desk and areas of focus for me. However before we go into what i’ve done let me show you the evolution of my Hobby Space over just the last 3 years.


Hobby Desk Evolution

Unfortunately I do not have photographs of my very first hobby stations growing up. Even though I distinctly remember them. My first ever real “hobby area” was at my uncle’s house who loved cars and putting together model cars. I would paint with Testors enamel paint and work on model cars in his basement surrounded by tools of all sorts and trades. I loved the space and most importantly loved painting with my uncle. I learned which various components of the engine where a unique color while hearing his stories growing up with different vehicles. Throughout my childhood I did love hobby crafting and mingled in other types of hobby crafts like model trains briefly.

Painting miniatures did not truly start until 2014/2015. My D&D group and husband would paint figures sitting at the dining room table preparing for the next dungeons and dragons game. Nothing was organized and was a complete free for all. While a ton of fun it was not the most conducive to having good light, tools, or improvement. The focus was purely for socialization. Lets just say were not the best of painters but the community & socialization aspect was a blast. The group and painting slowly fell apart as we graduated and moved all over the country starting our various lives and careers.

2018

Flash forward again to 2018 when I started 3d printing and the paint finally got pulled out again. I wanted to physically build the world I have imagined so much and provide a great tactile experience for myself and my players. With that I knew it was time to take painting more seriously.

My hobby desk was predominately made up with 2oz cheap craft acrylic paints, an old adjustable spice rack to hold the paints and create a shelf. I commonly used magazine pages to protect my desk.

Slowly I graduated to include a homemade wet palette, a white shelf that I was supposed to hang up on the wall somewhere, a very small self healing cutting mat, and a singular desk lamp. It wasn’t the fanciest and sat on my desk unless the project was too big for my small area and I could bring out the trusty old card table.

Eventually after the birth of my son my hobby space turned into the nursery. Thus resulting in having to migrate to a new room since most of my hobby time was after the baby went to bed. Better not use daylight bulbs in the same room as a small sleeping kiddo.

2020


The year of 2020 definitely resulted in the most growth for my hobby “stuff” and therefore the most improvement. Moving to the new room definitely was tricky. I was lower in the ground and it was definitely darker. Also this room has many many purposes. It is the main room walking into the house, TV space, laundry room, and my office. Having to attempt to keep it clean is always tricking as well as the rooms layout.

The first move into this space you can definitely tell I had boxes everywhere. Things weren’t labeled and the most noticeable feature is the cat ramp to let the cat look out the window and watch me while working.

Slowly but surely I added some important features:

Custom designed LED light tray to mount on shelf with parchment paper diffuser
3D printed brush and tool holder
Foam core, Work in Progress shelf to keep track of my many active projects

I also was given a large self healing cutting mat and added a second lap to round the whole place out. Towards the end of 2020, I got my resin printer and built a really wonderful enclosure for all my 3d printing next to my desk. I definitely was feeling more confident, really motivated, and immensely began to enjoy my space.

Dreaming of More

However i’ve always been jealous of the “Hobby Zone” Organizational systems with those sleek white drawers and having all of your tools and supplies organized on top of your workspace.

Picture of Hobby Zone Product from their website: https://www.hobbyzone.biz/modules.shtml


I cannot even articulate the number of times i’ve used the online desk mapping software to design my “ideal space”. If you want to design your own setup check out the Modular Workshop System Designer. However I knew I could never make the argument or afford such an epic system.

As a result I started to dabble in what 3d printed systems are on the market. Being able to 3d print my own system could potentially save more more money in the long run and make me feel like I contributed to its creation rather than just purchasing outright. To begin with I originally purchased the “Ultimate Modular workshop system” on myminifactory made by Meian. Never before in my life have I made a 3d printed purchase I regret so significantly. As a whole I found that many of the designs were missing and still after 8 months of purchase the files have not been updated. Also the parts themselves were not all labeled upon purchasing that it were be too large for the size of my 3d print bed. Not to mention the numerous failures due to poor design. This is the one situation where I wish there was a larger global system in place for customer reviews.

Then I found the “Paint Station Starter Set with UV curing station” by Esteban Cantu. Also located on myminifactory I purchased the STL set for $10 and got to work. Overall I enjoy the system, although at times I do find the boxes a bit too small. Over time I’ve been slowly working on adding more and more boxes as needed for my work bench. Also utilizing some old boards to make shelves.

3d Printer enclosure (left) & first major iteration of 3d printed drawers

2021 Hobby Desk Redesign

Fast forward to the last several months i’ve been growing and hobbying with significantly more gusto, including really working towards this blog. Which of course led to gaining more tools, supplies and need for organization. Also on top of that the region I call the “Baby Danger Zone” was constantly growing. I had to keep my area almost meticulously clean after every evening hobby in order to keep objects from being confiscated the next day (shown in image below). Even boxes on the shelf were no longer safe as he learned how to open and throw its contents everywhere.


As a result there was no choice but to grow upwards and deeper into the corner of my desk. This could not happen as my computer was sitting in the center of my desk. So I shifted it to the side in order to open up the entire length of my desk. I also was capable of getting my laps off the tabletop which opened up more space as well. This has been the most exciting installment of my renovation. This change alone almost doubled my available workspace. I am now capable to easily keep my notebook nearby for notes, a warm drink and my active project!

I converted a paintbrush drying rack into a tools rack giving my brush holder more space. This along with adding another paint rack and a DIY dowel stand to stack it upwards really changed the game of things that just sat on my desk.

The last major change and creation was to make a shelf/drawer box to hold all of my glue and adhesives. This is been a large problem for me since the super glue containers were too tall for most boxes and resulted in being spread out across the desk. Of course was not going to work having to protect my small from glue.


What’s Next?

Overall it has been interesting and a blast to see how my desk as changed and evolved overtime as I have. I still have a lot of things I want to improve upon such as organization for bits, greebles, basing materials, etc. I still haven’t found a permeant home for my paper towels.

There is also always the discussion of what warrants being within arms reach at all times for your hobby space and what could be put away and used more sparingly. This is something I think i’m going to have to just adapt over time. My biggest dream is to one day figure out a way to incorporate an airbrush and ventilate it. But that is a dream for much later.

I do love having the capability to organically grow my hobby space by 3d printing all the storage containers and drawers for my hobby space and being able to have more functional prints is fun.

How do you maintain and organize your hobby space? What priorities do you have for your area?


As always thanks for hanging out and reading. Let me know what you think.

Sincerely,

Crazmadsci


Continue Reading