Wood Color Palette on 1 inch round tavern bases

Wood Painting Deep Dive: Part 2 Improving your Color Palette

It has been quite sometime since I said I was starting my Woodworking deep dive (April 6th, 2021). It is definitely worth discussing the things I’ve done, worked on, and have to show since that time.

Just to recap for those who do not remember or haven’t read “Wood Painting Deep Dive: Part 1 The Questions, Inspiration and Self Reflection”.

I have begun an epic quest to improve my knowledge, tools, and experiences for painting wood textures for my tabletop projects. Being tired of painting everything the same and having all the shields, staves, trees, buildings looking the same I decided to attempt to learn more. This knowledge along with increased practice painting wood grains and trees would also help improve my confidence while painting.

I also have many other goals and ambitions is to do deep dives into the paint process and methodology of many different types of things in an effort to increase my understanding and skills in the hobby. Read more about my Deep Dive goals here.


The Questions


I began with attempting to seek out answers to these questions:

1) How can I paint different wood species to provide a larger variety color palette while still looking realistic?

2) What are the main wood types that I can use in the space and still not break the immersion of my tabletop? Primary focus in Fantasy or medieval time periods.

3) What are the various ways to add mold, decay, age, etc to wood grain?

4) What if the piece of terrain does not have a wooden texture. What mentality should I have while painting by hand? What are great ways to practice this?

5) How do I increase the variety of plant life on my tabletop based on season and biome? Almost all my trees end up being deciduous tree from a temperate climate.

6) Is there a “best” way to make trees? How many should I have? Considerations to have when playing on the table?


The Research

I began my search for information with the go to location: YouTube. Compiling an immense playlist for all things WoodPainting. In the end I compiled four primary playlists: Wood Effects, Wood done with Airbursh, Barrels & Crates, Faux Wood. The Wood Effects was my catch all for either unsorted or truly unique videos. In the end I collected over 80 videos on YouTube ranging from 2013 to 2021 and view counts sometimes as low as 200. As I was attempting to sort, take notes, and design painting challenges to grow in this space I realized one thing. Without a doubt I realized I might have dove too deep for starting out.

So I decided to peel back a bit into more manageable chunks. Starting with:

What are the main wood types that I can use in the space and still not break the immersion of my tabletop? Primary focus in Fantasy or medieval time periods. 

Thanks to a fantastic write up, “Wood in the Middle Ages” from the Rhode Island School of Design and Art Museum website. Essentially it gives the springboard to my ponderings.

Wood Type and Usage was primarily broken down by geographical region in roughly the 8th to 15th centuries.

Germany/Central Europe: Limewood or Lindenwood
Mediterranean: Popular
England: Oak or Walnut (less common)
Flanders, Netherlands, France: Beech & Elm

Wood Samples by Type


Well here was a start. I have about 7 different wood species to attempt to work on in my painting as inspiration. However I encounter a problem. I had no idea what colors I had if I was going to work towards a specific color palette.

Which was the perfect first series of tests and experiments!


The Beginnings of a Paint Experiment

Using my previously mentioned inspiration from Michael Cavagnaro on several facebook groups, who began making color swatches for contrast paints and wood textures.

Michael Cavagnaro’s color swatches. Source Miniature Painting Tips and Tricks Facebook Group

I began to make my own collection of swatches to hopefully give me a better picture on how to paint different types of wood. I thought about making the larger 2×2 dungeon tiles of which I actually even started printing and painting them but quickly realized that it would take too much time and material. So instead I printed 25 mm, standard tavern bases. These round bases were absolutely perfect and used very little material and I could print a large amount of them relatively quickly.

Beginning with the mentality i’ve seen very frequently in my lengthy YouTube research playlist I started with a collection of 25 bases all of which were primed black to start and then heavily dry brushed with a color of my collection. Almost all wood painting tutorials start with a black undercoat to help with shading.

Wood Painting Bases using a Black Primer
First Batch with a Black Primer

While seeing this collection grow gave me a large amount of satisfaction. However I was overall feeling disappointed with the small amount of diversity in my choices. So many colors were so dark I couldn’t even see the color only Black. I’m looking at you MSP Reaper Brown Liner! Perhaps I am doing myself a disservice by only doing a black primer by blindly following the teaches of the interwebs. So in the end I decided to build the project in the only way a crazy mad scientist knows how….

I added two more undercoat colors: Grey and White making it a total of 75 bases using the original 25 colors. All of these colors were model hobby paints coming from the brands: Vallejo Model and Game Color, P3, Army Painter, MSP Reaper, and Citadel. I have slowly been growing my collection of paints from various sources to also see if I prefer any over the other.

Not only that but I also decided to test my 4 contrast paints and brown & tan colors from my cheap hobby acrylics. This was most important since I was most likely going to use the cheap acrylics like $0.50 Apple Barrel paints.

In the end I created 123 total swatches of color for wood painting! In order to distinguish between the varieties I have labeled each underside of the bases with either a number (model paint), the letter C followed by a number (contrast paint), or an alphabetical letter (hobby paint). The key to the code of all the bases are put into my paint journal so I can always search through the swatches and pick out my favorites at any time without the bias of name.


Wood Painting Color Palette

Below are the images of all the swatches used in this test along with their name, brand, and my own cataloging tag. Each color is in three columns based on the primer undercoat; white, grey, and black.

Let me know what you think!


Contrast Paint


Model Paint


Hobby Paint


Conclusion

This painting palette test for wood painting has definitely taught me a few things.

1) Before this experiment I will admit I have heavily been biased against contrast paint as a “lazy painters” paint. As a form of shade and wash many paint in a one and done fashion. Without the need of additional layers or other painting techniques. Well after this test I will say that I’m definitely a contrast paint convert. Some of my favorite choices done are the contrast paint swatches.

The twelves bases painted to showcase contrast paint at three different undercoats.
Experiment using Contrast Paints

2) Do not underestimate the power of grey. So much wood has a grey hue to it. Some of the most realistic painted swatches are using the grey primer.

3) The cheap hobby paint does not nearly have the same opacity as the model paint. This would require several coats of paint for terrain projects. Which leaves me for a later question. Is it worth saving the money on the cheaper if you will perhaps spend so much more time on it?

4) Black might be my last favorite go to choice for undercoat for woodworking. While some looked decent I have so much more variety and capability while painting when using grey or white instead of Black.

Wood Bases showing extreme dark wood colors which are almost unnoticeable
Some of my Darkest Colors using a Black Primer

What’s Next?

Now I am left with of course more questions. Will a variety of colors look good on a single project? How can I push these swatches to look even better for painting projects? Which colors will match specific wood species.

This Deep Dive of course did not answer all my questions about wood painting but has definitely helped to take a step forward in the right direction. I have significantly more confidence in painting wood and am excited to experiment further, rather than intimidated.

Do you experiment anything when painting? What would you like to see tested further? Have an idea on the next step or something you want investigated in your hobby? Nominate it here.

As always Happy Hobbying.

~ Carrie the Crazy Mad Scientist


New Website Sections!

I’ve recently added new sections to the website to make this conversation and others for deep dives more easily accessible. Found under Painting you can navigate to either the homepage of all Deep Dives or directly to Wood Painting for more easily accessible information and pictures of the color palette.


Previous Writings

My Not So Lost Adventure – Mega Project Status Update

Group Image of all Miniatures printed so far for the Lost Adventures Volume 1 Kickstarter project.

What’s a Mega Project?

At the beginning of the year, I wrote up a very lengthy list of 2021 Hobby Goals for myself. While this list has been very ambitious there is one category that I have been working diligently on, my “Mega Projects”. I designated 6 mega projects that I wanted to work towards in my 3D printing hobby. The focus of most is to print 100% of the files from a Kickstarter I’ve previously backed.

There are a few exceptions to this rule such as props and such that come along with 3D printable Kickstarters. I only desire to grow my miniature collection, terrain, and buildings and not larger objects. I will perhaps consider going back to those once my kids are interested so they actually “find” an object or one such thing or another. Maybe they would drink real “potion” bottles to heal. Bring role playing into a bit of reality as they grow their understanding of tabletop games and inspire imagination. However, I believe I still have a few more years before we get to that point.

Why start these mega projects? Why is there a need to print these Kickstarters? I have two main reasons.

Goals

  1. There is nothing worse than buying a bunch of games, models, and terrain but never actually getting it on your table. The primary focus of these mega projects is to have a larger reexamination of my 3D printing model collection. For many 3D printing enthusiasts collecting digital files of sculpts is very similar to a wargamers pile of shame, pile of potential, or pile of opportunity depending on your preferred name. The goal was to convert these digital dreams into reality and therefore represent physical reminders for things to paint. Or turning this digital vault into “Piles of Opportunity”. Absolute worst case scenario I can still play with physical miniatures instead of digital files even if they aren’t painted.
  2. This is the first time in my hobby experience where I am crafting without having a current gaming group. Previously my hobby time was motivated by what I needed for the next session with my hobby group. Now I have free reign to make what ever I desire and potentially craft my sessions around these builds and miniatures instead. I’m excited about the inspiration and creativity that is driving my Dungeon Master mind to come up with new and exciting stories.

This hobby project idea and goal has brought me a ton of joy and excitement in my hobby time and i’ve been falling in love with models and figures I never would have otherwise. I do end up in spurts of mass production which can definitely chew through my hobby budget but I find that it’s worth it.

Since the year is half over it is time to evaluate my progress on one of these projects.


Lost Adventures Volume 1 Kickstarter

Lost Adventures Volume 1 is the second Kickstarter from the now titled company Lost Adventures Co. which focused on almost the perfect essentials kit for starting to 3D print and desire to add models to your table. With a healthy mixture of common monsters, bosses, scatter terrain, buildings, and scenery it is probably my number one recommendation for buying files. As a Kickstarter from 2019 FDM filament printing was the predominate style of printing miniatures so many sculpts and ALL the terrain and scatter prints absolutely supportless which also makes it useful for any starting 3D printing enthusiast. Also, out of any project I’ve ever backed these are most likely going to be the most used monsters and terrain I’d ever need for my tabletop.

This Kickstarter comes with 47 sets of miniatures and 37 sets of builds, terrain, and scatter (sets meaning individual purchasable sets such as “bandits” or “trees’ etc). Lost Adventures Volume 1 is my largest Kickstarter ambition of the year. I have decided to not print the supplemental props that could go with the encounters that come as well. The goal is 100% printing for functional tabletop pieces.

This Kickstarter I’ve been working tirelessly on for most of the year so far. I have printed several of the terrain and scatter pieces in the past as a test printer for the Lost Adventures Co. but I have yet to print the models in my own time. I have always known that I wanted the complete set for this Kickstarter but have set it aside for one reason or another. Now it is time to dust off the cob webs and knock it out of the park.


My Current Progress

I started to dive into this project at the Beginning of March full throttle. My primary focus was to work on tackling the miniature portion of this collection and then slowly add the scatter terrain and buildings.

So far in this project I have printed 75% of all the miniature sets, and 13.5% of the terrain and scatter. Combined making it approximately 47% of all individual bundles in the Kickstarter. I don’t think I truly realized how incredibly large this Kickstarter truly is and how much of a deal it was.

The Statistics:


Total Number of Models: approximately 108
Total Print Time: 14 days 18 hours 15 minutes
Total Resin Used: 1808 grams
Total Cost of Resin: $73.49

Original Kickstarter Price: $50.00 (Purchase now for $80.00)
Total Cost to Date: $123.49

Special Note: This calculation only includes the time for “Successful” prints. Failed prints are currently not counted and number provided above is ideal scenario. Total time and Resin usage is actually higher but exact value cannot be calculated at this time.

Total number of different sculptors & creators for models: 28

Note this does not include concept art & other members of the Lost Adventure Co time, only creators who produced a digital sculpt for printing.


Favorite Models to Date

Graveyard Golem- Khaldoth the Corpse Keeper


My absolute favorite model to date is the Graveyard Golem. What makes this sculpt really unique is that this stone golem has risen into creation in the middle of the graveyard. There is so much story packed into this model. On the model you can see coffins, chains, religious symbols, and so much more which was buried directly underneath the tombstones that are above the head of the golem.

Sculpted by James Dorrington this is now an absolute must have in my collection. However I am actually really incredibly nervous about painting and doing this model the justice it deserves.

Hydra Horror – Malgáthez the Devourer

The Hydra Horror will also always have a special place in my heart as it is the first miniature I have successfully magnetized. As a hydra this model has 5 necks with swappable necks to go from a 5 headed beast to a 10 headed monster and any variant inbetween.

Check it out if you want to read more about magnetization.

Sculpted by Artem Bespalov & Deryck Pelligrini.

Honorable Mention

Some of my other favorites in the collection so far are the Fire Giant, Commoners Pack 1, Watcher, Eye Horror and Lizardfolk


Not so Favorite Models

There are a few models that I have made that due to their design either just doing match my personal art style or I just don’t think they are modeled well for tabletop gameplay. With all good things and especially large scale things like this there is bound to be a few.

Lord of Liches Niru the Everlasting

This model would definitely fall in the “Love Hate” category. While I absolutely love the artistic style the design of the model and its super thin joints along with massively heavy spell effect make it absolutely non-ideal for gameplay. I would absolutely recommend that you NOT print the spell effect if you desire this model in tabletop play as it is prone to toppling over and breaking. Which is of course what happened to my figure not even a day after I took the picture.

Sculpted by James Dorrington, which is incredibly interesting because my favorite model the Graveyard Golem is also sculpted by him.

wolves

Also in the category of least favorite models. I do not know why but the fur texture on these wolves is not my ideal sculpting decision. While absolutely functional for tabletop play I admit that it is just not my art style. However that is one of the beautiful things about this Kickstarter because you can see so much variety of what is available in the tabletop space. I definitely think i’ll still paint these guys and practice on different types and colors of fur. Maybe with some color i’ll fall in love with the models.

Sculpted by: Eder Lindorfe

I am also not a big fan of the Storm Giant Seer due to her immense size which is much larger than my other giants from this collection and the hobgoblins. I think the hobgoblins are just too “bearman” like instead of a goblinoid but again personal preference.


What Next?

Well considering I have so much still to print especially in the terrain and scatter categories I am going to start working on that and writing the print logs for models printed before the site existed. At the moment I am taking a break from printing the miniatures but still plan on knocking the collection out before the end of the year.

I intend to work on updating and improving upon some of my other mega projects set aside for the year and will be writing status updates for those in the weeks to come.

If you want to see more of what I made and printed check out the complete list of the 108 miniatures below. Each photograph and Description will take you to their corresponding print logs which talk about my experiences, troubles, print settings, and more pictures of that collection.

Also feel free to check out the Lost Adventures Volume 1 Project Page for an entire list of all the models in the collection.


Complete List of Prints to Date


Forging Onward: Blacksmith Painted

Blacksmith Painted

Quicklinks: Introduction, Painting, Product Review, Statistics,
In Progress Painting, Final Photos, Missed Something?, A Look to the Future


Introduction

While it has been a very long and laborious journey, I finally have completed my second building from the Kingdom of Thamarya Kickstarter! I can safely walk away very proud of the journey I took and successes in this piece. In the beginning of 2021, I wrote up my hobby goals for the year. Contained in that list is 6 “Mega Projects” that i’ve designated myself to work on. Never did I realize that there would be accidently a 7th on the list.

The creation of the Kingdom of Thamarya buildings and my pure enjoyment of them has beyond a doubt turned into my 7th project “Mega Project”. I love their whimsical nature, detail, and flexibility for playable interiors. With miniatures, scatter terrain and 14 different buildings i’m off to build them all….. hopefully if my husband doesn’t stop me for storage reasons (Fingers crossed). The Blacksmith is approximately 9.5 in x 12 in x 6.5 in or 24.1 cm x 30.5 cm x 16.5 cm and is definitely showcasing that the Thamarya buildings are turning out to be much larger and more fun than I originally thought. I think the Blacksmith is one of the smallest in the collection. While I doubt i’ll use the buildings for an entire village build or scenario on a tabletop often I will perhaps utilize them as feature pieces or a playable street in a future game.

In this final write up for the Blacksmith I will discuss the various highlights of the painting project, my final product review for the building, fun statistics about the project, and most importantly in progress and final photographs. Also at the bottom I reference the buildings i’ve printed to date and things to come for this kickstarter.


Painting


Overall the Blacksmith was pretty straight forward to print with only one noticeable difficulty which was in the the roof assembly (Read about it here). However, while I was actively assembling the building I was creating the “beta” version and finalized files were yet to be released to the public. The roof actually updated the day after I finished assembling the Blacksmith. I opted to cut and repair with milliput rather than reprint the entire roof.

When painting the Blacksmith I really wanted to attempt to convey a story of a ramshackle building that has been repaired with the various materials laying around. Don’t have a matching blue roof tile, well a brown one would do. What about lumber of different species and ages, anything goes as long as production of the forge never stops.

Close up of the Blacksmith Roof Paint

Painting the Rocky Floor

I also attempted to portray a cheaper rockwork on the outside made out of softer rock and clays while the floor inside the building was built out of more solid and expensive materials. This more heat resistant stone I have as variations of grey and a bit of black representing slate. I was originally really nervous when painting the exterior rock and felt like it was risky. But I am so glad I went with it. I absolutely love the outside coloration and think I went to quickly to add variation inside with the grey stone in my excitement. I think the two varieties of color ended up clashing but overall is not a big deal as it is not common that the roof and wall would be removed for playability, showing the two varieties side by side to clash.

First Side Attempt at Exterior Rock Paint Job

Painting the Roof

All of these thoughts and storytelling led to the decisions I made on how to paint & the colors used. The largest decision I struggled with is that I am still very torn with the decision of if the Thamarya buildings should have a universal blue roof scheme or mismatch in color. While the Blacksmith building is still blue roof it is a slight variation of that of the Fishers Hut. At the moment i’m leaning towards having multiple colors of roofs for various buildings: Red/Orange Cottages, Purple Library or Wizard Tower, Green Peasant houses etc etc. What do you think should all my buildings be blue or should I mix it up? Let me know in the comments what ideas you have.

For the Blacksmith I absolutely loved what I did in painting the roof. I think the colors are vibrant and bold and my largest excitement was adding variation of the tile like there were patches over time and different colored lumber such as using anything that was laying around. I think this reflects personal growth in color choice and technique over the Fishers Hut. I now can’t unsee the muted monotone of all the lumber and roof tiles. I absolutely love the variation of color on the Blacksmith. What do you think?

Blacksmith vs Fishers Hut Roof Comparison

I picked the wood colors for the roof as one of the first steps of my work towards the wood painting deep dive. I will have a write up on my current experiment shortly I promise, for teasers check out my instagram.

Functional LED Forge

For this building I experimented with using transparent filament for the first time ever in my hobby experience. I used a vase printed mode to ensure there is as little plastic as possible in the middle of the model to ensure light can emit through the outer wall. I also printed at a very large layer height to reduce the amount of crystallization and therefore blocking of light. Because of these things I do not think the coals for the forge look as professional as the rest of the building. That on top of my lack of experience with painting hot or volcanic colors means overall i’m not as excited about how it turned out.

This aspect would be where I would look to improve in the future.

Painting Conclusion and Paint Log

One new thing I did that i’m really really excited about for this project is that I started a paint journal. In that journal I kept track of what color, mixes, and brands I used for different parts throughout the building. I am thrilled to have something documented to reference back on if I want to copy or take think I enjoyed about the project and do again in the future. Do you keep a paint journal for your projects?


Overall I’m super happy with the result, I will admit I did run into some painters block for while which I attribute to distraction preparing and having a new “tiny human” in the house. Now that I’m starting to get into a new routine that paint brush is finally coming back out. It feels great to be hobbying regularly again.


Product Review


Print Difficulty: Intermediate
Supported: FDM & Resin presupports provided *Note* I use my own supports for FDM

For the Blacksmith I give the print difficulty a rating of intermediate. For FDM printing, almost all files needed to be rotated to lay on the build plate for best orientation of first layer which requires knowledge of the print process. Thus printing this building should not be your very first project in the 3D printing hobby. Also the presupports for FDM are not always conducive to a 100% print success rate due to their thin and branching nature. Presupports for FDM are extremely reminiscent of supports for resin printing and are not always as stable as slicer generated supports. These thin supports have a very low success rate for myself and as a result I supported my own files for the Walls & Roof. If you are interested in my support settings check out the print logs.

Assembly: Intermediate

The Blacksmith while pretty straight forward in rectangular shape, I have rated the difficulty of assembly as intermediate. Due to the number of number of pieces and fit of several of the pieces. The most difficulty in my personal experience was the roof, which should be fixed with current version. However the porch poles to support the roof were floating and not attached to anything. This required me to extend and add to the front stairs and provide stability on my own.


Customer Support: Exceeds Expectations

I will absolutely admit that I am a massive fan of the sculpting company CastnPlay. This group is one of the largest patreon companies for supplying 3D sculpts for tabletop gaming. Their specialization is has always been miniatures printed on Resin printers and have provided helpful print settings and troubleshooting assistance. The team at CnP has been extremely receptive to suggestions and feedback while answering questions most significantly through their discord server. If you have questions going to their discord would be my suggestion but I am sure their facebook page or instagram would help out too.


The Statistics


Project Printing Start Date: February 7 2021
Project Printing Finish Date: February 24, 2021
Total Time to Print: 7 Days 3 Hours 31 Minutes

File Cost (Individual Purchase): $11.99 myminifactory
Sculptor: CastnPlay
Special Note: I purchased this building as a bundle in the kickstarter at a reduced rate.

Total Filament Used: 814.60 grams
Total Resin Used: 9.2 grams
Total Cost Filament/Materials: 19.54

Building Size: 9.5 in x 12 in x 6.5 in or 24.1 cm x 30.5 cm x 16.5 cm
Number of Pieces: 31

Date of Completion: July 18, 2021


In Process Photographs


Final Photos


Missed Something?

Want to catch up on the project of the Blacksmith Project or know more on what it took to make this building a reality. Read up more below!

In case you missed it do not hesitate to check out the Blacksmith Project Page for more information on each printed part, its assembly, and breakdown for resin & filament printing.

If you want to know more about the post processing stage and things i’ve done to modify the original sculpt make sure to check out the Blacksmith Status Update.


Next for Thamarya

Since printing the Blacksmith building in the Kingdom of Thamarya kickstarter I have since printed three additional buildings with two buildings already in the print queue. This brings the current printed & assembled house count to five.

Two of these buildings are the Cottages which you can find the Status Update and Project Page.

Cottage Buildilngs: Two Story and Three Story

I have also printed three additional buildings which I am working to add to the website. These are the General Store, Mausoleum, and Library.

Overall I am going to take a brief break from painting buildings and will get back to them shortly but in the end I very much miss painting miniatures. I am doing this in order to prevent burn out which I experienced with the blacksmith.


As always thank you for reading. Let me know your thoughts. What is on your hobby table today? Don’t hesitate to comment down below.

As always,
Crazmadsci, Carrie the crazy mad scientist

State of the Crazy: June 5, 2021 Introducing a New Gamer!

Update Quicklinks: Printing, Painting, Blog

Hello! Friends, family, fellow hobbyists & bloggers and everyone else. I hope you are having a great day so far. It is that time again, what is the current status of all things crazy going on? I don’t know about you but life here at the Crazy Mad Scientist household are exciting and just got a little bit more interesting.

Finally, after a much anticipated time we have welcomed a new gamer to our family. Im so excited to welcome our new son to our family and are all happy and healthy. This very tiny kid came out at 10 lbs 10 oz (4819 grams) and is 21 inches long (53 cm), needless to say I’m thrilled to have him in the world. I’m already scheming on how to fit in my hobby time around naps and imagining all the games we will play together.

Also with the new addition I have been taking inventory both physically and mentally of the status of all my Hobby Goals for the 2021 year. Its definitely going to be more difficult to stay on track but I think if I gauge my goals ahead of time we can still get things done. Some things i’ve been blazing through and others not so much. I’m still collecting data but will fill you all in as soon.


Printing Updates

In terms of 3D printing I have been absolutely determined to build myself a kingdom. I have no idea if all the buildings from the Kingdom of Thamarya will fit on my gamer table, aka the dining room table, or not but I have been having fun for sure. The most recent addition to the collection is the General Store this is bringing the total set up to 5 buildings. Assembly is not 100% completed and write up is in progress. I’ve also started on printing the mausoleum.

General Store Assembly in Progress

I can’t stop imagining all the props, scatter and miniatures I want to make in honor of celebrating the construction of this setup. I am trying to not get sidetracked in printing all the small things but have already dabbled a little bit into a carpentry and blacksmith props.

Resin Printing has definitely slowed down a bit for the time being as I catch up in my documentation and do not want resin to end up on my hands with a newborn.


Painting Update

As for painting, I finally finished assembling, post process clean up and priming all the pieces for the Blacksmith and Cottages from the Kingdom of Thamarya Kickstarter. Both required different types of print clean up and I tried many different techniques for gap filling, customization, and even encountered a few new issues and troubleshooted.

Now I am working on painting these three buildings and finding inspirational concept art. I am hoping to batch paint them and finish them quickly. The largest thing i’m struggling with is picking the color for the roofs. I can’t decide if the roofs of the various houses should be variable or one consistent color. Realistic or Whimsical. What do you think? I have the Fishers Hut with a blue roof. Should they match?

I might be personally leaning towards a red/orange roof shingle on the cottages and a blueish grey on the Blacksmith. Who knows we will see.

I also recently got some chipping medium from Vallejo and considering to approach a weathered over grown vine appearance on one of the cottages.

There is definitely a balancing act between experimentation and moving slowly with just getting them done to move on. Either way its a win win and any form of hobby done is a success and reward. Are you a fast and done or slow and steady painter yourself?

As for the Wood Painting deep dive. I have not forgotten about it, and am planning how I want to approach it. I was originally going to do large experiments and big categories but think i’m going to instead add slowly. First up painting different wood tones and an experiment on underpainting!


Blog Update

The blog is growing much faster in viewership and reading than I anticipated which is wonderful. I have actually hit my 2021 follower goal in less than 6 months into the year! Thank you for all the support and following the blog if you are one of those people. This is the first of my 2021 hobby goals that I have hit for the year and absolutely did not expect that. I’m honored.

The blog is also getting several hits for a few articles and guides and appearing on the front page of google for searching. I still have no idea what I did to warrant that as I haven’t worked on maximizing my Search Engine Optimization, SEO, but think its very cool that people are finding the site like that.

I have a lot planned and working on added more pages for navigation and am finding myself commonly referencing my own work and status updates to track my projects which is fantastic and exactly what I dreamt it would be for myself. However I do have quite a few one off write ups and posts that I need to create good navigation to and so it does not get lost. You will potentially find more pages that say “Work in Progress” for this reason. Please let me know if you see or experience any out of date links or broken links.

I think with the new little one around the writing and building of the site organization and structure are the perfect tasks as my movement around the house is still a bit sluggish.


Conclusion

Overall I am much more excited and happy with the improved pace and momentum happening in both the digital and physical hobbying. There was definitely a slow down in April but May I have been working hard to build it back up. Now to finish up and knock out some of these mega projects i’ve been working on and some catch up on the 2021 Hobby goals.

As always happy hobbying. What have you been working on? Have a specific highlight you are proud of?

Happy Crafting,

Carrie aka crazmadsci

Cottage Kingdom of Thamarya Status Update

Typically when you aim to create a building for tabletop gaming the first building is typically a cottage or standard house would be created as a starter piece. However this is my third building type from the Kingdom of Thamarya Kickstarter (Previous: Blacksmith & Fisher’s Hut). What is most unique about this particular building from CastnPlay is that you can choose to print three different variations of the building making it one of the most bang for your buck.

I printed two of the three versions, the two story and a three story with an attic/ gable on top. The only version that I did not create was the standard three story. Overall these buildings were the easiest of all the buildings thus far to print. For FDM printers the majority of all layers of the buildings printed in singular pieces, with exceptions of the roofs. I did choose to print the entirety of the 3rd floor in pieces rather than a whole for FDM 1st layer choices and supports (More info: 3rd Floor Print Log)

Feel free to check out the Cottage Project Page for the Print Logs, Assembly Guides, and overall summary/review of the Cottage so far.

As for the current status: I am now officially on the final Painting step for these buildings! WOOHOO. The hope and intent is to paint them in tandem with the Blacksmith. However I did attempt several new things regarding my post processing steps with these cottages after assembly.

Two Cottage Buildings Primed and ready for painting.

Always Trying Something New … Or Forced To

Whenever I do projects it is very common to attempt new things for personal growth and learning. In this case I tried three new new things.

  • The Use of Spackle/ Drywall Compound for smoothing the underside of my roofs for improvement in finish.
  • Magnetizing some of the layers for the building.
  • Use of 0.5 inch foam for architecture flavor!

These were important steps for finishing the cottage but added a significant amount of time to its overall steps before priming.

I also was forced to try something new after priming my models because they melted and warped in the sun… Oops! I’ll talk about what I did to save these pieces as well.


The Search for the Best Compound for Terrain Gap Filling

On each and every single building so far I’ve attempted to use a different medium for gap filling between the pieces in the assembly for the buildings.

Fishers Hut: Green Stuff (Base & Roof)
Blacksmith: Milliput (Blacksmith Roof & Stair Modification)

So far each of these various tools had pros and cons in its usage. I have enjoyed Green Stuff for its sculpting capabilities but spreading over large areas was a problem. For several of these buildings I have not been the happiest with the underside appearance of the roofs due to support settings and the difficulty of the curvature of the sculpts. I have experimented using different settings such as support density but still have not perfected these prints for this particular set of buildings.

In general the underside of the pieces would never matter and almost no one would see them however I have a particular opinion that “I’d know and would see it”.

Example of Underside of Roof Pieces.

For the Blacksmith however I tried Milliput on the underside of the roof which had better spread capability than Green Stuff. It also dried harder and was easy to sand and cut away. The downside was that I tended to use a lot of it and it bunched together with itself to become bumpy without the use of lots of water.

So this time around I decided to try Dry Wall Compound also known in the US as Spackle. I ended up buying a small container of it online: “DryDex Spackling” as a 1/2 Pint (8 Fl Oz or 236 mL). I didn’t want to buy a large container because I had no idea if I would like it.

The fascinating thing about it was that it starts pink and as it dries turns white. This is great if you want to know if you can move onto the next step.

Before and After Drying

Overall I found it easy to smooth but terrible for sculpting. Some of the underside of the wood beams of the 3rd floor for example I tried to sculpt and found it extremely difficult and almost not worth it. The dry wall compound tried well and you could sand it smooth. Personally I hate the chalky texture and it definitely makes a mess when sanding. The use of a damp wash cloth or paper towel helped to clean up my workspace though.

The Sculpt attempt at wooden beams

Due to Dry Wall Compound and its actual purpose in home building you can simply prime on top of it without need of any additional steps once done.

What Did I learn? Its a great cheap choice for covering a large area, easy to smooth, see when dried, but not idea if any sculpting or more specific work needs to be done.

Have you used dry wall compound on any of your hobby projects? How was your experience? Is there something else I should know or test?


Do I like Magnetizing too much?

Ever since I experimented with magnetizing the Hydra model to have swappable heads, (Read Here: “How Do You magnetize Models Anyway?”), I admit to being a bit of an addict to using my new pin vise toy and magnets. Since these buildings came in so many sandwiched layers of; floor, walls, floor, walls, roof, walls roof, I did notice that the buildings as a whole were a bit top heavy. I want to keep the buildings completely modular and have playable interiors so gluing them all together was not idea. Instead I decided to experiment with magnetizing my FDM buildings to provide more structural integrity.

Magnetizing FDM is slightly different than Resin as my buildings in particular have very little material inside. I most commonly print all my pieces with only 5% infill meaning that 95% of the space inside the model is completely hollow. The buildings are still quite strong but simply drilling a hole in the model could lead to a magnet falling into the abyss.

The steps for magnetizing these models:

  1. Find the two pieces that fit together & check their fit
  2. Use a small pin vise and drill a pilot hole (I used a 2 mm bit)
  3. Use a larger bit to drill out the hole for the magnet. (Predominately used a 6.5mm bit)
  4. Mix some green stuff and push into the hole. This creates a sticky compound to keep magnet at surface of print without falling in.
  5. Check the fit of the magnet (6x2mm magnet)
  6. Check the polarity of the magnet. Make sure opposing magnet is opposite pole. To mark side that goes into the model I would mark with a black sharpie.
  7. Apply Glue. Not necessarily needed for FDM since green stuff will harden and hold magnet in place.
  8. Use toothpick to navigate magnet into hole.
  9. Once dried check model again for fit and polarity.
  10. Optional: If desired could add super glue on top of magnet to ensure it does not fall out.

Note: Bold indicates new steps for FDM and crossed out is not needed.

In order to make sure magnets on both ends would match I did add bright acrylic paint on top of the magnet and combined the two pieces together to indicate where the opposing magnet holes are needed.


In the end I magnetized the 1st floor Base & Walls on both buildings. I also magnetized the entirety of the 2 story Cottage and 3rd Story addition to 2nd Story roof. Overall I did use 6 x 2 mm magnets and once used 4×2 mm magnets but preferred the strength of the the 6 mm diameter. The strength and fit feels really great with the one notable exception of the 2nd Story roof. I ended up putting magnets and drilling into the dry wall compound and due to the extra layer of spackle the pull force was not quite strong enough and is debatable on its value.


Trying to Add Architectural Elements

The one thing I wasn’t the happiest with regarding the design of this cottage is unfortunately a combination of weakness in printing models in filament and the sculpt itself. However it is also one thing I love about these buildings. As you can see the cottage gets wider as you climb up from the 1st story to the 2nd story of the building. To my knowledge this was a common architectural element of the medieval time period. The process of widening on subsequent floors in known as Jettying. If my rusty high school history lesson memory can be trusted, this was done because people were taxed based on square footage of 1st story. Therefore slowly expanding your house’s footprint going up was used. Others say that this technique is to increase space on the ground level for street traffic. Regardless I wanted to see if I could include it in the build itself.

The largest feature visible on these homes is the addition of support beams used and extruding from the underside of the next floor. I absolutely love this additional flavor in detail.

Stock Photo of French Street depicting Jettying

Why is this important for the Cottage? Well due to having to print the 2nd story floor completely flat against the build plate. There is absolutely zero detail for painting on the underside of the floor. This one aspect of the design of the building drove me nuts so I decided to try my hand at cutting foam and using it in conjunction with the building to add this architectural element. As a result it would add detail to an area of the building greatly needing it.

However, I have never tried using foam before. I know that foam is one of the core elements in almost all tabletop crafters toolboxes but has not been apart of mine…. until now.

I ended up purchasing Pink Insulation Foam, XPS that is 1/2 inch thick (6.35 mm) and cut a long sliver out of it to match the thickness of the existing wooden beams on the exterior of the cottage. Then cutting down length to size glued to the bottom of the wooden floor. I learned the hard way that you SHOULD NOT use superglue to glue the foam to the PLA which apparently melts the foam… oops. Silly Chemist you should know these fundamental principles. Well guess not. If you want to glue to PLA with XPS try PVA (Elmer’s Glue) or Hot Glue.

In general I was pretty happy with the appearance of this extra, wooden beams. To solidify the foam I also put on two coats of Mod Podge which stiffened and added extra adhesion for the foam to the PLA while also making it easier to paint later. The only downside is that I did not sculpt out the detail for wooden timbers before adding the mod podge. Guess I will have to go old school and paint on the detail. I was also able to prime the foam after the mod podge with a can of spray paint without melting the foam!

What do you think? Is this a worthwhile addition in detail?


How Much Heat is need to Melt your Building?

Yay, I finally finished all the post process cleanup to be able to paint! Or well so I thought. Since I do not own an airbrush I will prime my miniatures and terrain outside using a spray can and bring inside my enclosure to dry and ventilate out. However since I was working on two different copies of the Cottage I had many large pieces and they did not fit easily in my enclosure. So I left them to sit overnight outside.

Little did I know that it was going to be an incredibly warm the next day and my filament 3d printed pieces warped under direct sunlight. I almost entirely print on my Prusa MK3S using PLA or Polylactic Acid as the filament material of choice due to its ease in printing, releasing less toxic fumes as other alternatives, and low cost. However printing PLA requires a melting temperature of around 180 C or more for printing. Even on a hot day where I live my heat would only get to around 30 C or (85 F), 5 times less than what I print at. Regardless around lunch time when I went out to get the prints from the back porch I found this….

Both the 1st Story and 2nd Story floors warped. You can see the curve in the pieces themselves. Needless to say I was really frustrated and disappointed especially after taking the time to magnetize the 2nd story floor (I did not have the 1st story magnetized yet).

Talking to my amazing husband we cooked a plan to bend them back. Using the same heat that warped them we set the pieces out in the sun and used wooden blocks and weights added pressure points to bend them back flat. Overall It did really really well. I’m pretty satisfied with the results.

However the downside which was completely unpredicted. The pieces themselves shrank. This resulted in the male/female pegs of the floors not matching up with the walls anymore. None of the connections to the warped pieces would work. This was the primary requirement for magnetizing so much of the building. To salvage the parts without having to reprint I ended up cutting off the male pegs and magnetizing walls to all previously warped floor pieces. The end result definitely shows some more gap than I would like between sections of the building but we did save the buildings without having to reprint so much of it.

I am super surprised that the pieces shrank and will definitely have to go read more on the mechanical properties of PLA.


What’s Next?

I have really been enjoying catching up on the documentation of my projects and working on these houses. So far I think the Kingdom of Thamarya Project is a fan favorite for many of my readers and Instagram followers. I am still a write up or two behind for this particular project as I finished printing the General Store and am currently in the process of assembly. Stay tuned for the project page on that building! I have also started printing the Mausoleum. Pretty soon I am going to write a status update on the Kickstarter as a whole and an in depth review of the project so far.

I have also been working really hard to update all the print logs for the Lost Adventures Vol 1 Kickstarter project.


Thank You

Lately I have received so many positive messages regarding the work I have been doing on getting this site up and running and following along with my projects. It means so much to me, Thank you.

Let me know in the comments what you think of my latest installment to the Kingdom of Thamarya.

Happy Hobbying,

Carrie aka Crazmadsci the Crazy Mad Scientist.


Blacksmith Kingdom of Thamarya Status Update


Post Processing ~ Documentation Improvements ~ Other Buildings In Progress ~ Painting

The Blacksmith building from the Kingdom of Thamarya Kickstarter is the 2nd installment into my goal of a complete set of the entire building collection. It has been slow but steady. Every building I make I feel as if I am always trying something new and pushing my knowledge and skills as a crafter and hobbyist. The absolute dream is that at the end of the year i’ll have an absolutely mind blowing tabletop to share. Although I’m behind in painting the population for the kingdom and the scatter terrain. One battle at a time.

As for the current status of the Blacksmith building I have assembled and almost completely (a few exceptions) primed the building as a whole. I have spent a little bit of time putting on paint for the walls of the building but definitely not enough to claim a base coat. If you would like to read more about how I printed, assembled and my overall experience with the Blacksmith building make sure you check out its main project page, Blacksmith: CastnPlay.

Even thogh the building is printed and assembled, one thing that has taken a significant amount of time is the post process and creative modifications done to the building itself.


Post Processing

First of all what does post processing even mean in regards to 3d printing? Since many of my readers do not 3D print I will explain. Post processing refers to any task that is put on a printed part to touch up, clean up, or enhance the piece. In some cases that would mean support removal, or resin printing clean up. In the situation for this post I am referring to any manual crafting I’ve done in order to truly enhance the building itself.

QuickLinks: Roof Gap Filling ~ Front Porch Pillars ~ Functional Forge ~ Magnetic Blacksmith Sign


Roof Gap Filling

The first step for cleaning up the assembly of the Blacksmith building was to fill the gaps of the roof. There were some difficulties in the assembly of the Roof due to printing an early beta version of the house (Read about it: Blacksmith Roof Assembly). As I had to cut and trim several of the pieces to ensure that they fit together. The gaps of the model showed more significantly than I would like. As a build I would like to own for years and years to come, I knew that the labor to clean it up was worth the time.

Since i’ve been experimenting with different putties, clays, and sculpting mediums for this type of task, i’ve opted to try Milliput this time around. Milliput is an epoxy putty which comes in two parts to sculpt and harden later on. In previous experimentation on a base I found that Milliput was much harder when cured than Green Stuff which I thought would be perfect for a building.

Overall I found Milliput easy to work with over large surfaces if I also introduce a bit of water to my tools and fingers. As you can obviously tell from the roof itself though, my sculpting skills are still a work in progress. The edges are not smooth and milliput filled in the gaps of the tiles at the bottom. I ended up using milliput on the top of the roof to fill the gaps as well as attempt to smooth the underside of the roof from imperfect filament sagging due to print orientation. I know that almost no one will ever see the underside of the roof but I’d know. I choose to attempt to fill in the roof underside rather than sanding or trimming because it was a large flat surface that would have taken way too much time to do along with the fact that the Milliput could strengthen the multiple pieces of the roof. I wasn’t too crazy worried about finish though because I could cut away harden Milliput I didn’t want or sand it down which is nice.

Please let me know if you have a better idea on sculpting material for this post process step. I am intending to try all sorts of mediums but always open to new ideas.


Front Porch Pillars

The front porch pillars were definitely one of my least favorite parts of the building. I do not know if it was due to my assembly of the house or its design but the pillars themselves were too short. In order to touch the roof they had to float off the ground and if glued to the base they would never support the roof. The second issue with the supports is that they never actually touched any other piece of the building in order to securely glue them into place.

When coming up with a solution I also factored in a few design constraints;
1) The interior has to be playable and roof easily removable. aka roof needs to sit flat on the tabletop.
2) The components of the building itself have to be durable both for storage as well as small children playing with them.

In order to fit design constraint number 1, I knew the pillars could not be glued to the roof as it would make roof removal clunky and not sit flat on the tabletop if removed. For the second constraint I decided to physically extend the stairs of the front porch to hold the pillars in place. To accomplish this I used small dowel rods to create a bit of structural strength and hold the pillars in the gap between the bottom step of the front stairs and the porch. Then using my newly acquired skills with Milliput and some freshly purchased metal sculpting tools I sculpted an expanded front staircase.

Overall I am extremely happy with the result and those pillars are very securely in place. I also learned that sculpting tools are an absolute necessary and I can’t believe I waited so long to purchase a set.


Functional Forge

One of the other major things I’ve been determined to do is include more is LED’s in my builds. I love the concept of having hidden lights in my builds or using them to really bring the table to life. This was the one build I chose to backtrack just for the occasion.

Since the interior of the building has a specific location for a forge and a 3d printable file for coals in that forge. I choose to drill out a hole for a standard tealight. Starting with one of the largest drill bits I could find, I drilled a pilot hole and then cut away material as I needed. Make sure you wear goggles if you ever try this! Cutting away the material was definitely difficult as I had to cut away at a seam between two pieces which had more solid walls but having a low infill of 5% material helped me as well. Since the edges were sharp I used Milliput again to soften the edges so people do not cut themselves pulling out the LED to turn it off. Note to future me: Cut out the tealight location digitally so it prints with the hole already cut away.

After I prepped the space and fit of the tea light I reprinted the coal file to be in transparent filament. This ironically is my first ever attempt at printing with Transparent filament even though the roll has been taunting me for over two years in my cabinet. Although I do not have a whole lot of experience with printing in transparent filament I am really pleased with the result. For the light itself I did a simple hole for the LED itself to sit in the printed coal file.

Now the next challenge is going to figure out how to paint the coals without turning this opaque. I’ll be sure to fill you in on what happens when I paint it.

Teaching Moment: For those not familiar with transparent filament for FDM printing. The process of fused deposition modeling (FDM) printing essentially melts down plastic through an extruder head which in turn recrystallizes into the the shape the 3d printing moves the nozzle. Due to this behavior it is extremely difficult to get a true transparent look in your 3d prints and the results are instead semi-transparent. To compensate for that people would ideally attempt to reduce the amount of layers or material that is printed to reduce the amount of recrystallization.
Analogy: Think of it as making a window of thousands of tiny window panes vs a window with only tens of window panes. It is easier to see out of the window with less window panes.


Magnetic Blacksmith Sign

Last but not least for this building I decided to magnetize the sign for the Blacksmith. This could make it so the building would appear like any building as well as improve storage capabilities. I am nervous about storing the building with the sign jutting out of it because I admit to not being hard on my models. I used 4×2 mm magnets and placed one in the hole of the building wall where the sign would go and one on the end of the sign. Overall these fit well but I do wish I drilled a hole into the wall so that way the sign was more sturdy.

This is definitely not fancy by any stretch of the imagination but if you want to do this the 4×2 mm magnet is a perfect fit!


Documentation Improvements

One also major thing I’ve done with the blacksmith project page this time around is to attempt to provide an assembly diagram for either print method of your choice. Since FDM printers have a larger print bed and are easily more capable of printing with large flat surfaces, the team at CastnPlay has reduced the total pieces to print for FDM models. As a result assembly, total number of pieces, and even part names could be different between FDM and Resin models.

I am still ironing out a way to improve the look of the graphic to articulate the difference but would love to hear what my readers think about the attempt to cater to the community since there is no guide to assembly of these buildings at this time.


Also since others may be like me. I am also including a overlap or translation table so that way if you print in both FDM and Resin for the pieces of the buildings you know what pieces in the resin files would match what pieces in the FDM files. Is this easy to understand and read?


Other Buildings in Progress

The Blacksmith is not the only building i’ve been working extensively on over the last few months. I have successfully printed to completion not one but two Cottages from the Kingdom of Thamarya collection. I decided to create two variants for these buildings a two story and a three story. I am currently in progress of writing, updating and releasing the product page as well as a status update for the buildings like I’ve done for the Blacksmith.


General Store: This building is currently being actively printed. I started a while ago, got distracted, and am finally on pace to potentially finish printing this building this week.

General Store Assembly in Progress

On to Painting!


Definitely let me know in the comments below if you liked an idea or think I could have tried something different. I’m always looking for more ways to experiment.

As always. Happy Hobbying,

Carrie aka crazmadsci the Crazy Mad Scientist

Storage Wars (Part 4) Project Tracking & Workflow


Introduction

Last but not least, regarding my war of attrition against entropy is my recently improved project tracking and workflow system.  It might sound silly that one would need to require a method of keeping track of projects and steps within projects, however since I jump around alot having some kind of method to my madness helps. Not only do I need some kind of system to help me keep track of project statuses, I want a method to keep track of what I’ve done, plan to do, or ideas for the future. The whole process has become increasingly more complex with the addition of the website as well.


Previous Project Software

Before I go into the current system I’m using lets talk about ones I’ve used in the past. Previously I’ve used and tried all kinds of software such as Trello for project statuses. Using software such as Trello is what was most familiar in form and function to systems used in previous jobs so navigation for massive projects was ingrained in me already.

While I enjoy this software a lot and it does have integration to my cell phone and other electronic devices. The system uses a series of boards which can have cards to slide across the boards to track what step pieces of that project are worked on. Each card can have notes, links, attached files, and even be integrated without side programs. This would make it easy when sitting around to add more or less to the Trello board and see project status.

Previously used main Trello Board Page

The largest downside to this method is that I struggled having a board for each project and having the projects fit my monitor without scrolling. Having a better global picture of my progress at one easy glace was not easy.

Lost Adventures Vol 1 Project Board

Another downside of this is that I want to keep track of what I accomplished each day or what area of the hobby I was focused in. This aspect is not accomplishable through trello.

To compensate for that I have been using Evernote which is a digital notebook to keep track of different write ups, mental notes, etc. I used both Evernote and Trello in tandem to build a workflow state. But again it became too complicated as I began to grow the number of ideas I had, projects in various states of completion or just things I want to remember. As I wrote more notes they slowly got lost more and more frequently in the depths of my various notebooks defeating the purpose of writing them in the first place. I still sometimes write drafts in Evernote such as a recent post draft: How Do You Magnetize Models Anyways

Current Evernote Setup

The New and Improved

I have been using Trello and Evernote together since about December and decided to try something a bit different. After listening to one of the latest episodes of Paint Bravely the Podcast, Brent from Goobertown hobbies mentioned the usage of a bullet journal for the hobby. I have always appreciated the concept of a bullet journal but never considered it for a specific aspect of my life. If you are not familiar with a bullet journal it is essentially a planner that is catered exactly to your needs. The reason for this is that the bullet journal is essentially created by you the writer to fit your needs. There are some people who completely obsess with the visual appearance of their bullet journal and I’m definitely aiming for more function.

There are Pinterest boards, YouTube videos and even a designated subreddit on the subject of bullet journals and various templates for creating each page. 

To better understand what I mean how about I share some of my favorite pages so far. 

The largest pages that I am currently using regularly are:

1) A main project page

             This includes all the steps it takes for each category to get from being printed to having a write up on the blog along with being cataloged in my collection.

This is the same as a trello board with cards mentioned above but there is something extremely satisfying with coloring in each square and being to see the project as a whole more clearly. I use blue as completed and orange as blocked due to some reason or another at this time. 

2) An idea bubble.

             This is new and is essentially my idea page for a landing website page for the blog. I like to have an idea of what I want to add to the page when designing and planning things I have to come. This can help me scheme global layouts and I can mark them off as they are completed. 

You can see in this page I’m hoping to have a series of guides regarding resin printing. It can be a wide and complex category so any time I think of more to add I’ll put it in the bubble with notes to the side of what they would contain. 

3) Monthly hobby type wheel.

             I absolutely loved seeing the percentage of days I spent doing different aspects of the hobby for my January/ February Retrospectives but I lost track of it in March/April due to the data being hosted on a google spreadsheet. This is a super easy way to summarize a large overview of what I did for that day. I have a key at the bottom to dictate what each color means. Anything blank means I unfortunately did not get anything worth noting done that day.

             I do also have a weekly/monthly planner of sorts which I write the info of what I accomplished in more detail.

Overall the system appears to be working for me and it is easy to carry a notebook around the house. The only difficulty is if my small assistant runs off with my pen or colored pencils which he loves to do.

I have noticed that since moving to a physical medium for note keeping my productivity has increased. I am also working through my backlog of data faster and more efficiently. 

I don’t think any system is perfect and it is a long work in progress. I’m hoping to include paint recipes and colors in the future to the notebook but I am burning through pages faster than anticipated. I might need another book which stays on my desk at all times.

Do you have a system in place for project management? 


Conclusion

Thank you for following along with my short series for storage and organization.  I know this was a ton to unpack but has been essentially the last two months of my hobbying experiences.

I am slowly starting to hobby again and finish things up but doubt I will be really ready to dive into something again until after the new addition arrives to our house and a new normal is in place in terms of routine. However I have been putting a lot of work into the Kingdom of Thamarya buildings I’ve printed. I’ve tried several new things that I’m looking forward to sharing with you. Stay tuned for a write up on that! 

As always thanks for hanging out and reading. Let me know what you think.

Happy Hobbying,

Crazmadsci


Continue Reading

Storage Wars (Part 3) Miniature Storage


Introduction

Miniature Storage is the largest areas of time sinks I’ve had over the last two months. While it feels silly that one can spend so much time on the method of which to store and organize models and figures. My mentality is that if I will spend the time to make & create these things why not protect them as well.

I started to do research on the different storage solutions out there for miniatures including magnetizing, foam trays, carrying cases, nail polish stands, etc.

Lets look at some of the different types.

Magnetizing: Is a system i’m super interested in doing, however this is more rigid to based miniatures and ones with hollowed bases to hold magnets. Since most of my 3d printed miniatures do not start out based this would not work for the pile of opportunity I have laying around. Also many 3d printed bases do not have holes for magnets and would require drilling. I would say magnetizing is the most common solution i’ve found online for miniature figures.

Nail Polish stands: These are extremely popular for both paints and miniatures to allow you to have an amphitheater type display shelf of what you have done. While this looks nice I do not have the shelves to store my miniatures.

Hardware Drawers & Tackle Boxes: Also popular since things like tackle boxes have sectioned areas with separators and are meant to be portable. However the hard plastic of the sectioned areas I knew would be to tough on my more fragile miniatures. I also need a mobile system so the hardware drawers would not work and would need something close to a box.

Foam Trays: This is probably the closest to what i’m looking for. Using foam tray would help isolate individual miniatures and also be modular to mix up which trays are out and about at any given time. However I also have heard quite frequently that foam trays commonly rub paint off the miniatures. I have not been consistent about varnishing my minis and am worried about that happening.

These trays can also come with soft or hard cases and sometimes travel bags to go to game stores or tournaments. This would most likely be the most expensive option for my miniature storage. I am personally not yet ready to invest in something super expensive and am still evolving my collection. I also needed my storage to be mobile and rigid to be capable of stacking as well unfortunately climbed on while still keeping the figure safe. I think I’d do an official system such as this if I ever owned my own completed army for 40K or similar.

Feldherr Maxi Figure Case example

As a result this is of course as you probably already have guessed it caused me to begin experimenting with various storage solutions of my own to cater to my unique needs.


Previous System Design

Previously, the most complex system I’ve used was designed by my incredibly handsome husband which used a modular sliding tray system to hold models. I would have a plastic box which could hold up to 8 of these trays and each tray would hold approximately 30 standard miniatures. Therefore each box could hold up to 180-200 models. It was an incredible way to hold models in place for an extremely efficient model per area storage method. Trays could be designed to hold a variety of base sizes and only required some simple 3D modeling changes.

The downsides however began to creep up on me. Firstly, if the figures were of varying base sizes especially non standard 20 mm, 25 mm, 50mm, etc. sizes they would not fit onto the trays and stay. So I’d need to make specialized trays for them or some kind of holder per miniature that didn’t fit the design criteria. Also not all miniatures come with bases already on them requiring me to temporarily tack them onto a base or glue them. Also the way the tray holds into the miniature the ideal threshold for height of the bases and things on it resulted in a slim threshold for flexibility and creativity. As a result trays are being shelved (pun intended) for the time being.


The one thing I’ve absolutely loved was using this tray system however was using a custom wall mount above my workstation to hold miniatures up and out of the way.

Example of the working wall mount

Current Iteration

As a result to the rigid restrictions of the 3d printed storage solution. I started to design my own miniature storage trays that was not as dependent on learning design software. I’m still such a beginner using the various software and realized I was reliant on the incredible talents of my other half. I’m not afraid to learn but sometimes these things take time you do not have at the moment.

Earlier in the year I started experimenting using cardboard, foamcore, and old archivist book board (from an old job). I thought I was have an interstate move so I then began to organize my scatter terrain. Previously I stored scatter terrain in the classic plastic craft/jewelry plastic box, however I was outgrowing my storage containers quickly and needed a larger storage solution that would be more efficient and cost less overall.

While the above system works well it did not give me a lot of flexibility for reusability as I wanted to move objects around or hold things in place more resulting in a consistently more chaotic box every time I moved it or the baby bumped the box.

Overall I loved the concept of the newer storage but I needed to store more fragile miniatures. Time to go back to the drawing board in material choice. Criteria, I needed a more robust and flexible system.

I concluded to use almost all foam core aka poster board as my material of course. The goal of the foam core is to be semi soft but also rigid. This could provide protection for the figures but also be capable of bearing the weight of several in a tray. Also since it is soft I use toothpicks to hold spacers in place adding to extra rigidity to hold miniatures in place but also modular to be reused in the future as my storage adapts and evolves.

I planned to make trays that fit into some of my favorite boxes, plastic ornament boxes. This would make me capable of making it modular and therefore adjustable for almost all my figures based or not up to about 4 inches (10.16 cm) in height. If the box is the top of the stack and due to how the lid sits on the box rather than inside of it my models can go up to 4.5” in height.

Favorite storage boxes. Snapware Snap ‘N Stack 13 x 13 inch

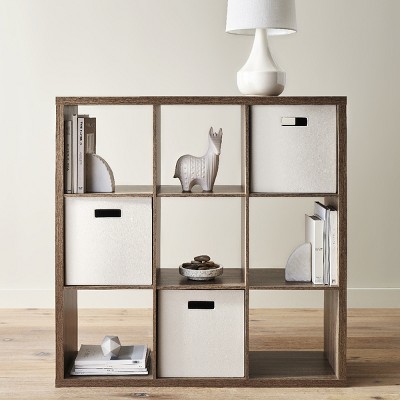
I also discovered that since these boxes are essentially 1 x 1 feet (30.48 x 30.48 cm) my trays will also fit perfectly in the cube boxes which are affordable and even available at the grocery store. Any trays I made would be capable to store in the super prolific cube shelves with the cloth boxes as well.

Cube Shelf Example

The Miniature trays themselves were similar to the scatter terrain trays but were instead constructed with 100% foam core. The bottom and sides would be glued using hot glue and I also glued the rows to hold the miniatures. Then using white foam core I would use toothpicks to hold the miniatures to custom widths to snugly fit the models. These could be adapted and changed as needed if the trays changed its contents. For the guide on how I built these trays check out my DIY Foam Core Miniature Storage Guide.

For the trays I’ve counted approximately 70-80 standard miniatures per box (two trays per box). I also have made a variant for large monsters but have yet to completely fill an entire box at this moment for the full count.

Miniature Storage Tray Example feature Lost Adventures Vol 2 Models

In some cases for larger miniatures I would instead use a harder card stock as the bottom saving the 1/4th inch ( 6.3 mm) in height and could customize the height.

Large Mini Tray in progress

I also used different cardstock on the outside of the trays so that way from afar I could pull out specifically what box I was looking for in the future.

Overall I’ve really happy with the solution as it can be modified to almost all my miniatures and scatter terrain. Also due to the rigidity of the boxes and foam core it can currently withstand the weight of a small human who apparently likes to climb on them.

Tiny Human sitting on a miniature box

I have some future ideas on trays for terrain that I’m looking forward to experimenting with. That will have to wait though. For now these homemade foam core trays are my current solution. Let me know what works for you? Have you experimented with different methods? What ideas you have on improving my system.


As always thanks for hanging out and reading. Let me know what you think. Next up, the evolution of my project organization, notes, and workflow as apart of my Storage Wars Series.

Happy Hobbying,

Crazmadsci


Continue Reading

How Do You Magnetize Models Anyway?

Over the last several weeks in between a nice vacation to see my family after almost a year, my 30th birthday, and preparing for our new arrival to the family (about a month to go!), hobbying has been slow but steady. Overall I’ve been working on tieing up loose ends in my attempt to 3D print all the miniatures from the Lost Adventures Vol 1 Kickstarter. I have been printing a significantly large amount of miniatures and keeping track of them has been complicated along with keeping the models safe from my one year old. However I’ll get into that storage and project management at a later date.

I recently did a project that i’m immensely proud of and thought i’d share my experiences…. I magnetized my first ever miniature successfully!

Magnetized Model of a Hydra


For some this sound silly but for others this is an incredible feat that opens up the realm of endless possibility. If you do not understand what I mean by magnetizing miniatures let me explain. Magnetizing miniatures commonly occurs on models where the player or hobbyist desires to be able to swap out arms, heads, weapons or more on the model. This could be done for aesthetic reasons or be a functional part of gameplay. Players could “purchase” weapon upgrades or armored machines could be “destroyed” and fall apart while actively playing a game.

In the case of this project I magnetized, a Hydra. This Hydra model I got my the Lost Adventures Vol 1 Kickstarter and it has been on the list of things to print. Finally getting it printed and coming out terrifically I decided to add some extra TLC to this figure. For information regarding my print history check out the print log, Hydra Horror.

For the extra work for this model I desired to simulate a core behavior of this ancient Greek and Roman mythological monster. If you are not familiar with a Hydra, it is most famous for its mythological fight with Hercules son of Zeus.  I was first introduced to this ferocious monster in the 1997 animated film “Hercules” by Walt Disney Pictures.

In the movie Hercules is seeking to become a hero and is baited by the minions of  Hades to fight a Hydra. This young and arrogant man takes his sword and repeatedly cuts off the head of the Hydra. Little does he know is that a Hydra is capable of regrow its head and replacing it not with one but two new Heads. This was the behavior I wanted to simulate.

Animated Hercules fighting the Hydra in the beginning.
The result of the Hydra after getting heads cut off in the movie.


While working on my project of printing the miniatures from the Lost Adventures 1 Kickstarter I encountered the perfect model.

Their Hydra Horror named “Malgáthez the Devourer” sculpted by two freelance sculptors,  Artem Bespalov & Deryck Pelligrini, is a Hydra that comes with a main body, 5 neck slots and the choice of either 1 neck or 2 necks for each slot. This allows for the flexibility of this model to be created with 5 to 10 heads in 120 possible combinations. Now I will admit that I did not actually realize that there were 10 printable necks for only 5 printable slots until I accidently printed them all up regardless. I mindlessly just filled my Phrozen Sonic mini 4K build plate with models and hit go. Not wanting to waste any resin and seeing the opportunity for something really and truly epic I decided to attempt magnetizing the model. Yay for happy accidents.

I then again was faced with questions in the hobby space. How in the world do I magnetize a model? Where do I begin? What tools do I need? Is this worth investing into?

Normally I would be hyper critical and ultra analyze others and their projects for magnetizing models reading blog posts, searching forums, watching youtube videos. But for some reason I decided to blaze into the challenge blind. Which I should say was a ton of fun. I was not completely oblivious to the process of magnetizing models as a viewer of hobby youtube channels have shown this being done several times throughout the years of watching. However those are typically 30 second clips in 15 minute videos with no obvious guide.


In this case I knew a few things that I needed.

  1. Magnets
  2. A way to create recesses in the model for the magnets

Goals:

  1. Magnetized each neck to be replaceable on the model
  2. The magnet should be strong enough to hold the neck in place
  3. The magnet cannot impede the fit of the neck on the model and sit as seamlessly as possible.

Project Shopping

Now I had an idea of what I needed I decided to tackle the first problem: what size magnets? Knowing that I desired the strongest possible for the size chosen regardless I restricted my search to rare earth, neodymium magnets. I have previously used magnets in terrain such as my magnetized dungeon tiles using 5mm sphere magnets. I have also gotten magnets for other projects and had 3x1mm cylinder magnets for a previous attempt at magnetizing miniatures. These were not strong enough for the weight in last attempts for magnetized storage. I also had some 6×2 mm cylinders from a project I was supposed to do years ago…

Knowing this I decided I needed a bigger magnet than 3×1 cylinders but smaller than the 6x2mm. The end goal was to hide it in the model itself and not have it show through. Therefore I needed to purchase something in between. Normally this is the time where i’d go online and try to hunt for the very best deals and in some cases wait months for my magnets to arrive. Since in this case I wasn’t sure what I truly needed and wanted to get stuff moving off the tabletop. So I decided to go through Etsy to buy magnets. Etsy is not only a site where people can buy most commonly crafted goods & even 3d printed miniatures but also materials. Finding a vendor I ordered some 4x2mm cylinder magnets. My order was quick and much faster than if I ordered from a large magnet site that could take months.

With part 1 of the things I needed down I had to figure out a way to make holes in the solid resin model pieces to place the magnets. I already owned an affordable pin vise as I tried to learn its variable uses. Pin Vise link shown on the right.

However I did not have any drill bits that were big enough to make one hole for the magnets I ordered. Knowing I wanted to make only 1 hole to cut out as clean of an area as possible I ordered a set of big bits for these types of projects.

Being so excited to have my pin vise, magnets and models I set out on my mission. Only to discover that the pin vise would only hold up to 3.5 mm bits…. well I guess I need to find another tool for the job. After doing some research and even considered 3d printing a vice from thinigiverse I merely purchased a beefier vise on amazon that can hold all my new drill bits.


Magnetizing in Summary:


After buying all of my fun toys. I was off to the races! Overall this was surprisingly easy to accomplish. Each neck had a great fit into the main body and overall lead to making sure the alignment of the magnets went by super smoothly. I did not have to worry about the neck being too off center from the body due to the pretty impressive male/female pegs cut in the STL. Shout out to Lost Adventures Co and their sculptors for that hard work. In almost all cases the fit and form of the neck to the body was pretty close to seamless, well for a body that has swappable heads.

As for the strength of the magnets I only encountered trouble on neck #2 (moving left to right). Due to the fact that this neck is pointing down with gravity this neck needed a stronger magnet in order to stay in place. I ended up not realizing that this was such an issue until after the magnet was glued into the body. However I was able to cut out the magnet from the double necked head and replace it with one of my 6×2 mm magnets. This provided extra strength and helps attach the neck. Unfortunately the neck is very sensitive to movement and is more likely to fall off. All in All i’d recommend potentially gluing this head and magnetizing the rest to make it more sturdy.


Magnetizing Process:

  1. Find the two pieces that fit together and check their fit.

This was the time to check to make sure that no support marks were left on the model and I indeed have the correct pieces to go together.

  1. I used my small pin vise and drilled a pilot hole

I did this to help with the use of the big drill bit and assist in not shattering the resin model with force. Overall this helped to center the larger bit as well.

Hydra with pilot hole
  1. Use the larger bit (4mm) to drill out a hole.

I always ended up having to go a deeper than I thought I needed to. This accounts for potential space with the glue & fragments. I’d rather have the magnet slightly inside the model as opposed to sticking out.

  1. Check the fit of the magnet.

    If magnet did not fit correctly then I extracted the magnet from the hole, commonly using a pair of metal tweezers and repeated step 3 as needed.
  1. Check the polarity of the magnet.

    Overall I wanted the necks to always be attracted to the body. This was overall accomplished really well with the exception neck 2 of which I got the polarity flipped.  Most commonly I would mark the side of the magnet that would have glue on it and go into the hole drilled with a black sharpie pen so I could remember which side was which.
  1. Apply glue.

For my 3d printed resin models I used super glue.

  1. Using a tooth pick help navigate the magnet into the hole.

I made sure not to use a metal tool placing the magnet so that way the magnet would actually go into the hole and stay centered in the hole. If using a metal tool the magnet was “accidently” pulled away and glued to the tool. No of course this would never happen to me…..

  1. Once safely dried enough check model again for fit and polarity.

If polarity was accidently reversed then models would not connect and magnet would have to be removed and flipped. This only happened to me once or twice and was relatively easy to fix. I know this will not always be the case.

An example of a neck swap of one and two necks on the model.


Conclusion

This project has been a ton of fun and is one that I will take pride in. I am definitely intimidated with the concept of having 15 total heads to paint and what color scheme to paint the whole body. Should each neck slot be a different color like the famous Dungeon and Dragons Tiamat dragon? Should it all be the same? My husband thinks I should make the 2 neck variant a lighter color than the one neck to represent new growth. What do you think? Have you magnetized anything cool?


In Progress Shots

Wood Painting Deep Dive: Part 1 The Questions, Inspiration and Self Reflection

Herein lies the first installment of the beginning of my wood painting deep dive. Wow, do I have a ton to unpack for this series and am already running out of “time” as I attempt to break things down and schedule them out. I can already tell that like all things in art and hobby there is no definite end or mastery but rather a continuous journey. So lets get to it!


The Problem

I do not know about you but I absolutely hate painting wooden textures in the tabletop space. In my mind almost every aspect of the hobby includes wood of some form. Miniatures have shields, perhaps wooden tavern bases, wooden helmets, bows, staffs, handles to weapons etc. Terrain can be trees, a fort, a barricade, tables & chairs to just name a few. Don’t even get me to start listing different buildings built out of wood. Everywhere I look I have to paint more wood onto objects. 

As a crafter I am now faced at a crossroads. Do I continue doing the same thing, paint, method and color? OR Do I attempt to grow my knowledge and skill? Obviously since I am starting a deep dive category regarding the subject I’ve obviously chosen road number 2.

Now let us face the looming question. How do I make all the things with wood in my collection not look the same? I am aspiring to diversify my collection and wheel house of choices as well as skill.


The Questions

1) How can I paint different wood species to provide a larger variety color palette while still looking realistic?

2) What are the main wood types that I can use in the space and still not break the immersion of my tabletop? Primary focus in Fantasy or medieval time periods.

3) What are the various ways to add mold, decay, age, etc to wood grain?

4) What if the piece of terrain does not have a wooden texture. What mentality should I have while painting by hand? What are great ways to practice this?

5) How do I increase the variety of plant life on my tabletop based on season and biome? Almost all my trees end up being deciduous tree from a temperate climate.

6) Is there a “best” way to make trees? How many should I have? Considerations to have when playing on the table?

7) What about paint on wood? How do I paint color onto a wood finish and still keep the texture?

These are just a few of the numerous questions I have when painting wooden things for my tabletop. I am sure there are going to be plenty of others and not all will be answered in this short series but at least it will get my foot in the door, of things to look out for while I’m researching and painting.


The Inspiration

Part of the inspiration for doing deep dives at all is from a facebook post by a man named Michael Cavagnaro in the Miniature Painters Tips and Tricks group on December 4, 2020. He created a large collection of wooden floor tiles for reference using different washs & contrast paint on top of 2 undercoats. The first was just a printed Brown PLA and the second primed with white spray paint. 

Inspiration Work by Michael Cavagnaro

While this is a great reference document, I am unable to find the original source as well as do not frequently use or own many contrast paints. I am also someone who currently has the mentality that the extra time spent on learning, and making it look as good as I can. My intention is that each wagon, tree, shield I make and paint will last year’s and I am in no rush to make my ultimate game table, battle map, and epic miniature paint job. Within reason of course, finishing projects is the goal after all.

My plan is to make not only my own sample selection of paint for wood like Michael did but also be more transparent on paints used for others to grow the collection. 


My Wood Painting Journey Thus Far

In reality I did not truly get into the miniature painting and tabletop gaming hobby until 2014 of which was a brief introduction which was not rekindled until summer of 2018 when I started 3d printing. Check out the Beginnings into 3d printing if you are curious about how I got my start specifically for 3d printing. 

Like almost all people the starting prints in the hobby consisted of scatter terrain things like treasure chests, trees and the like. Then I saw the project that I absolutely MUST do. My first ever 3d printable file purchase was a lake backer purchase of the Forest of Oakenspire by Evan Carathers. This project is royalty among wood terrain. A fully modular, livable, tree village! I mean come on who doesn’t want to make that? 

Kickstarter Image of the Forest of Oakenspire Tree house.

In the end as a brand new person into 3d printing I decided to start with something “small” (insert laughter) of a flying airship from that Kickstarter set. To this day it is still a project I haven’t completed and is looming over my head. One day i’ll finally finish it.

Airship work in progress project from 2018.

Not too long after I started diving into Dungeon tiles and 3d printed some tavern tiles.

We can say that the project got a little bit out of hand. Also that I might seriously have an affinity towards Dungeon Tiles.

I worked on docks for city harbors, these are made an Openforge design by Devon Jones.

I’ve also made bookshelves, tables, trees, and so many more things made out of wood. With the exception of the dungeon tiles, every single one of these projects I have never completed because I was unhappy with the quality of paint job and diversity of my wood based builds. 


Wood Painting in 2021

This year however, 2021, I have decided to put more work into painting wooden textures and have already tried a few different things and learned quite a bit already.

Starting one of my first paint jobs I painted the siege equipment from the Fantasy Props Kickstarter. The Trebuchet and Catapult I learned a very important lesson about underpainting. So far I have always primed the wood brown and layered up. The method used for the siege was a black base coat then dry brushing up. I love the dark hue underneath and there is definitely something there that deserves more time and experimenting.

Another wood paint style i’ve attempted this year is a more dynamic wood age and weathered look. Painting the fishers hut I used a large variety of colors to attempt to give the grain and planks their own unique look rather than a static uniformity that I think tends to be dull. I have gotten so many compliments on this specific paint job and am excited that my going in blind approach of throwing colors at it actually came out great. I would like more confidence in doing this though rather than just throwing a hail Mary and hoping it turns out well.

I also really really loved the fact that I added bronze paint to attempt to showcase a rusted nail look on the planks of the Fishers hut. It is actually my favorite painting aspect of the entire project.


All in all wood is the perfect example of just how crazy in depth the crafting hobby can go. Due to the sake of length as well as providing more time for research I am going to extend the research portion this deep dive for next week. While I think I have had a great start in improving my skills of wooden painting for the tabletop hobby there is so much more I can do. I’m excited about pursuing it further. 

Stay tuned for next week where we break down various applications of painting wood textures, materials commonly used, where its commonly found, and the planning of future painting projects to test new concepts.

Do you have any questions about painting wood? What kind of things would you like to see experimented?


New Website Sections!

I’ve recently added new sections to the website to make this conversation and others for deep dives more easily accessible. Found under Painting you can navigate to either the homepage of all Deep Dives or directly to Wood Painting for more easily accessible information and pictures of the color palette.


Previous Write Ups